

Interior wall putty and painting are important finishing activities in building construction. Once the plastering work has been completed and the surface has dried properly, the next stage is usually surface preparation followed by putty application, primer and interior paint.
A good painting finish does not depend only on the quality of the paint. Instead, the final appearance depends on several stages, including plaster quality, surface cleaning, putty application, sanding, primer application, paint mixing, application technique and drying time.
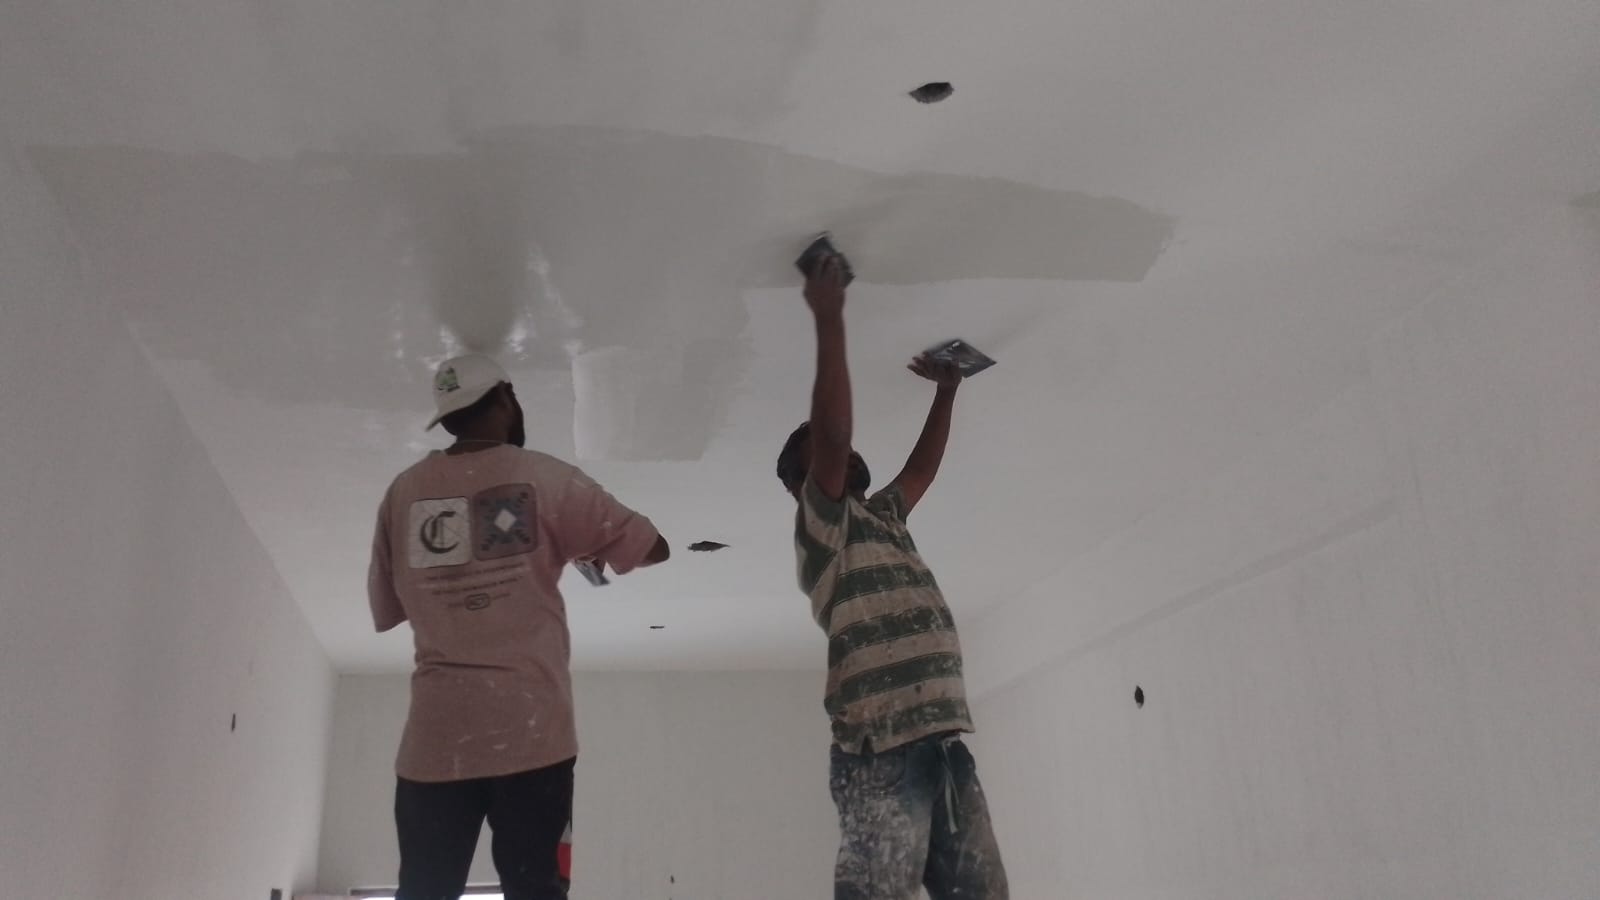
The photograph from the construction site represents a typical interior finishing activity where the walls are being prepared for painting. At this stage, workers focus on creating a smooth and even surface so that the final paint can produce a clean appearance.
Whether the building is a house, apartment, office, commercial property or other structure, proper interior wall preparation can significantly improve the durability and appearance of the finished space.
In this article, we will explain the complete process of interior wall putty and painting, including the materials required, surface preparation, putty application, sanding, primer, painting procedure, quality checks, common mistakes and important site precautions.
What Is Wall Putty?
Wall putty is a finishing material applied over plastered walls before primer and paint.
Its main purpose is to improve the smoothness and uniformity of the wall surface. Plastered walls may contain small pores, uneven areas, minor surface imperfections and trowel marks. Putty helps fill these small irregularities and creates a smoother background for subsequent finishing.
However, wall putty should not be used as a replacement for proper plastering.
If the wall has major undulations, structural cracks or significant defects, those issues should be corrected before applying putty.
Why Is Putty Applied Before Interior Painting?
Directly painting an unfinished plaster surface may produce an uneven appearance because the plaster can absorb paint differently in different locations.
Putty provides a more uniform surface.
The major benefits include:
- Creates a smoother wall surface.
- Helps cover minor surface imperfections.
- Provides a better base for primer.
- Improves the appearance of the final paint.
- Can reduce visible pores and small irregularities.
- Helps achieve a more uniform finish.
- Makes decorative interior painting look cleaner.
Therefore, proper wall preparation is one of the most important parts of interior painting work.

Materials Required for Interior Putty and Painting
Before beginning the work, the required materials should be arranged at the site.
| Material | Purpose |
|---|---|
| Wall putty | Filling minor surface irregularities |
| Primer | Provides a suitable base for paint |
| Interior emulsion paint | Final decorative and protective coating |
| Clean water | Used where required for material preparation |
| Sandpaper | Smoothing the putty surface |
| Crack filler | Repairing suitable minor cracks |
| Masking tape | Protecting edges and adjacent surfaces |
| Cleaning cloth | Removing dust |
| Roller | Applying paint efficiently |
| Paint brush | Corners and detailed areas |
| Putty knife | Applying and spreading putty |
| Scraper | Removing loose material |
The exact products and preparation method should always follow the manufacturer’s instructions and the project specification.
Surface Preparation Before Putty
Surface preparation is the foundation of a good painting job.
Before applying putty, the wall should be inspected carefully.
Dust, loose plaster particles, grease, dirt, old loose paint and other contaminants should be removed.
If the wall is dusty, the putty may not bond properly.
Therefore, workers should clean the surface thoroughly before beginning the finishing process.
Any loose material should be scraped away.
Similarly, cracks and holes should be inspected. Minor surface defects can be repaired using an appropriate filler or repair material.
However, large cracks should not simply be covered with putty. Their cause should first be investigated.
Checking the Plastered Wall
Before starting putty work, the plaster should be sufficiently dry and stable.
The site team should check:
- Wall alignment
- Surface unevenness
- Cracks
- Damp patches
- Loose plaster
- Hollow areas
- Construction joints
- Electrical openings
- Plumbing-related defects
If water leakage or dampness is present, it should be addressed before painting.
Painting over a damp wall can lead to peeling, staining, blistering or other finishing problems.
First Coat of Wall Putty
Once the wall is properly prepared, the first coat of putty can be applied according to the selected product’s instructions.
The worker uses a putty knife or suitable application tool to spread the material across the wall.
The application should be reasonably uniform.
Excessively thick layers should be avoided unless specifically permitted by the product system.
The objective is to fill small surface imperfections rather than create a very thick layer over the entire wall.
The worker should also pay attention to corners and junctions.
Drying After the First Putty Coat
After the first coat is applied, it should be allowed to dry adequately.
The required drying period depends on the product, environmental conditions, temperature, ventilation and humidity.
Workers should not immediately start sanding or applying another coat while the material is still soft.
Adequate drying allows the putty to develop the required surface condition for subsequent work.
Sanding the Putty Surface
Sanding is an important step in achieving a smooth interior finish.
After the putty has dried sufficiently, the surface is sanded using suitable sandpaper.
The objective is to remove minor ridges, tool marks and uneven portions.
Sanding should be carried out carefully.
Excessive sanding can remove too much material and create unnecessary unevenness.
After sanding, the wall should be cleaned thoroughly to remove the generated dust.
This step is important because loose sanding dust can interfere with primer adhesion.
Second Coat of Putty
Depending on the required finish and product specification, another coat of putty may be applied.
The second coat helps improve the overall uniformity of the surface.
After the second application dries, sanding can again be carried out.
The wall should then be inspected under suitable lighting.
Good lighting is particularly useful because small waves and surface defects can be difficult to notice in poor lighting.
Importance of Primer
Primer is an important layer between the prepared wall and the final paint.
Once the putty surface has been completed and cleaned, a suitable interior primer is applied according to the paint system.
Primer can help:
- Improve paint adhesion.
- Provide a more uniform base.
- Reduce uneven absorption.
- Improve the appearance of the topcoat.
- Help achieve better consistency in the final finish.
The primer should be applied uniformly.
Corners, edges and difficult-to-reach areas should receive adequate attention.
Interior Painting Process
After the primer has dried properly, the final interior paint can be applied.
The paint should be prepared according to the manufacturer’s instructions.
If thinning is required, the recommended quantity of clean water or specified thinner should be used.
Excessive dilution should be avoided because it can affect coverage and finish.
The paint can be applied using a roller, brush or other suitable equipment.
Rollers are commonly useful for larger wall areas, while brushes are helpful for corners, edges and detailed sections.
First Coat of Interior Paint
The first coat provides the initial colour and coverage.
Workers should maintain consistent application and avoid leaving heavy paint patches in one area and very thin coverage in another.
The roller should be moved systematically across the wall.
Working in manageable sections can help maintain a consistent appearance.
After the first coat is completed, sufficient drying time should be provided.
The exact drying period depends on the paint product and environmental conditions.
Second Coat of Paint
A second coat is often applied to improve colour consistency and coverage.
The second coat should be applied only after the previous coat has dried sufficiently.
Applying another layer too early can create finishing problems.
A properly applied second coat can provide a more uniform colour and improve the final appearance of the wall.
However, the number of coats should follow the paint manufacturer’s recommendation and the project’s required finish.
Painting Corners and Edges
Corners are among the most visible areas in an interior room.
Workers should therefore take additional care while painting:
- Wall corners
- Ceiling junctions
- Door frames
- Window frames
- Electrical switch areas
- Skirting junctions
- Beam and column edges
Masking tape may be used where appropriate to maintain clean boundaries.
Brushes are often more practical than rollers for narrow areas and corners.
Ceiling and Wall Painting Sequence
The sequence of painting work should be planned carefully.
In many projects, the ceiling is completed before the walls so that accidental splashes or roller marks on the wall can be corrected during subsequent wall painting.
A typical sequence may be:
Surface preparation → Putty → Sanding → Primer → Ceiling painting → Wall painting → Touch-up → Final inspection
However, the exact sequence can vary depending on the project’s finishing system.
Interior Painting Quality Checklist
A site engineer or supervisor should inspect the finished work carefully.
| Check | Requirement |
|---|---|
| Surface | Smooth and properly prepared |
| Putty | Uniformly applied |
| Sanding | No major ridges or tool marks |
| Primer | Consistent coverage |
| Paint | Uniform colour |
| Corners | Neat and straight |
| Coverage | No obvious thin patches |
| Finish | Free from major defects |
| Dust | Surface should be clean |
| Moisture | No unresolved dampness |
| Touch-up | Defects corrected |
| Final appearance | Consistent under suitable lighting |
Common Problems During Interior Painting
Uneven Wall Surface
If plastering or putty application is uneven, the final paint may highlight the defects.
Therefore, the wall should be checked before primer and paint.
Visible Sanding Marks
Poor sanding can leave marks that become noticeable after painting.
Proper sanding and dust removal are important.
Paint Peeling
Peeling may occur because of poor surface preparation, moisture, incompatible materials or inadequate adhesion.
Painting should never be considered a solution to an underlying dampness problem.
Colour Variation
Colour differences can result from inconsistent application, improper mixing, different batches, uneven absorption or insufficient coats.
Blistering
Blisters may develop when moisture or other adhesion problems exist beneath the coating.
The underlying cause should be identified rather than simply applying another layer of paint.
How to Avoid Painting Defects
Good planning can prevent many common problems.
First, make sure the plaster is adequately dry.
Next, clean the wall properly.
Then apply putty uniformly and allow adequate drying.
After sanding, remove all loose dust.
Apply primer evenly.
Finally, apply the recommended paint coats with proper drying intervals.
Most importantly, workers should follow the manufacturer’s instructions for each product.
Importance of Proper Drying Time
Drying time is often underestimated during construction.
Contractors may be under pressure to complete the finishing work quickly. However, rushing one layer before the previous layer is ready can affect the final quality.
Putty, primer and paint should each be allowed to dry according to the product requirements and site conditions.
Temperature, humidity and ventilation can influence drying.
Therefore, the site engineer should consider actual conditions instead of relying only on a fixed time without checking the material and environment.
Interior Painting and Site Housekeeping
Painting work produces dust, empty containers, plastic sheets, masking materials and other waste.
The work area should be kept clean throughout the process.
Flooring and finished surfaces should be protected from paint splashes.
Electrical fittings, doors, windows and other completed components should also be protected appropriately.
After completion, the room should be cleaned before the final inspection.
Safety Precautions During Putty and Painting
Workers should follow basic safety practices during interior finishing work.
Suitable gloves should be used when handling construction chemicals and paints.
Adequate ventilation should be maintained, especially when working with products that have strong fumes.
Workers using ladders or elevated platforms should ensure that the equipment is stable.
Paint containers and tools should be stored safely so that they do not create trip hazards.
The work area should also have sufficient lighting because good visibility helps both quality control and worker safety.
Putty vs Primer vs Paint
These three materials perform different functions.
| Material | Main Function |
|---|---|
| Putty | Smoothens minor surface imperfections |
| Primer | Prepares and stabilizes the surface for the topcoat |
| Paint | Provides final colour, appearance and protective finish |
Understanding this difference is important because one material cannot always replace another.
For example, applying extra paint cannot compensate for a badly prepared wall.
Recommended Interior Finishing Sequence
A typical interior wall finishing sequence can be represented as follows:
1. Complete plastering
↓
2. Allow adequate drying
↓
3. Inspect the wall
↓
4. Repair defects
↓
5. Clean the surface
↓
6. Apply putty
↓
7. Allow drying
↓
8. Sand the surface
↓
9. Clean dust
↓
10. Apply primer
↓
11. Allow primer to dry
↓
12. Apply first paint coat
↓
13. Allow adequate drying
↓
14. Apply final paint coat
↓
15. Carry out touch-ups
↓
16. Final quality inspection
Following a systematic sequence helps reduce rework and improves the consistency of the finished surface.
Role of the Site Engineer
The site engineer plays an important role in maintaining finishing quality.
The engineer should verify that the background is ready before allowing putty work to begin.
Furthermore, the engineer should check material specifications, application procedures, surface preparation and workmanship.
The engineer should also monitor drying periods and inspect the final finish.
If defects are observed, they should be corrected before the area is handed over for the next construction activity.
Final Inspection of Interior Painting
The final inspection should preferably be carried out under good lighting.
The walls should be checked from different viewing angles.
Look for:
- Uneven colour
- Roller marks
- Brush marks
- Visible cracks
- Pinholes
- Surface waves
- Peeling
- Stains
- Dust particles
- Paint splashes
- Poor corners
- Incomplete coverage
Small defects should be corrected before the room is handed over.
Conclusion
Interior wall putty and painting are more than simple finishing activities. They are a sequence of carefully connected operations that begin with surface preparation and continue through putty application, sanding, primer, paint coats and final inspection.
A smooth and attractive interior finish depends heavily on the condition of the plastered wall. Therefore, construction teams should not rush directly into painting without properly preparing the surface.
Proper putty application can improve the smoothness of the wall, while primer provides an appropriate base for the finishing paint. Subsequently, carefully applied paint coats can provide the desired colour and appearance.
Most importantly, good workmanship, suitable materials, adequate drying time, proper surface preparation and regular quality inspection should be maintained throughout the process.
When these steps are followed correctly, the finished interior can achieve a cleaner appearance, better consistency and improved long-term performance.
also click here
Suggested Tags:Interior Painting, Wall Putty, House Construction, Painting Work, Wall Finishing, Construction Work, Interior Wall Painting, Building Finishing
Share this content: